
因为经常想看博客的访问量,每次打开浏览器比较麻烦,索性用树莓派、Arduino和lcd1602显示屏打造了一个博客访问量显示器,实时显示博客今天的访问量,以下是制作的过程和代码。
一、所用硬件
树莓派 一个
Arduino 一个
lcd1602显示屏 一个
10k电位计 一个
杜邦线 若干
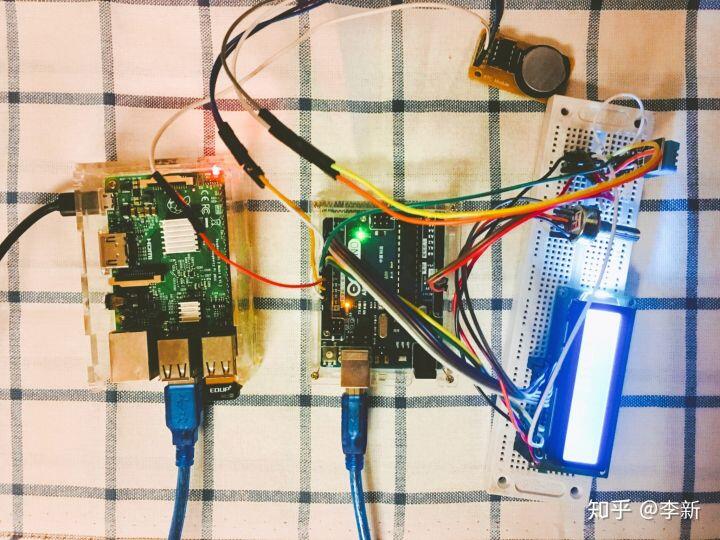
二、硬件连接
Arduino 和 lcd1602之间的连接参考这篇文章:Arduino使用LCD1602显示屏
Arduino 和树莓派用USB 线进行连接。
连接完成后是这样的:
三、总体思路
用树莓派通过API获取博客今天的访问量,用串口将访问量发送给Arduino ,Arduino通过串口接收到访问量的数据后,用lcd1602显示出来。
参考文章:
树莓派获取博客今天的访问量:树莓派显示博客网站实时在线人数
树莓派通过串口发送数据:树莓派通过串口发送数据
Arduino接收串口数据并显示:Arduino 接收串口输入的数据并通过LCD1602显示出来
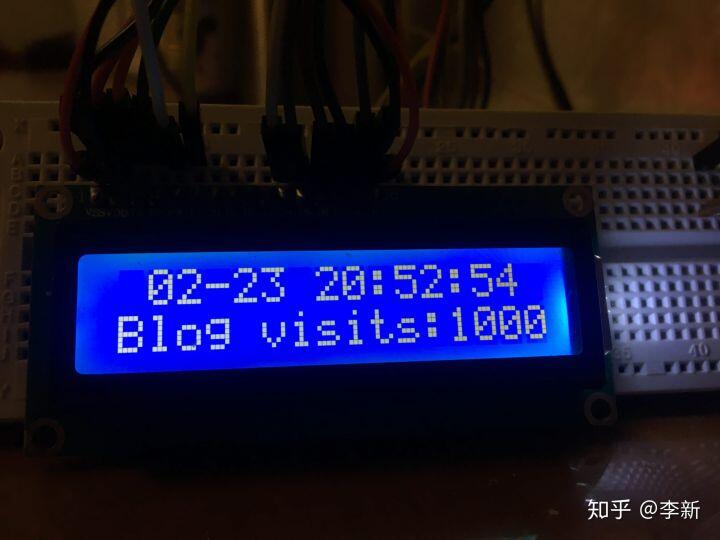
最终显示效果如下图:
四、程序设计
1.Arduino端:要完成lcd1602的初始化,完成串口接收数据并显示,还加了一个ds1302模块,在显示博客访问量的同时显示当前时间。程序如下:
//引入依赖 #include <stdio.h> #include <LiquidCrystal.h> #include <DS1302.h> String str = “”; // 初始化LCD针脚 const int rs = 7, en = 6, d4 = 5, d5 = 4, d6 = 3, d7 = 2; LiquidCrystal LCD(rs, en, d4, d5, d6, d7); //初始化DS1320针脚 const int kCePin = 9; // Chip Enable const int kIoPin = 10; // Input/Output const int kSclkPin = 11; // Serial Clock // Create a DS1302 object. DS1302 rtc(kCePin, kIoPin, kSclkPin); String dayAsString(const Time::Day day) { switch (day) { case Time::kSunday: return “Sun”; case Time::kMonday: return “Mon”; case Time::kTuesday: return “Tue”; case Time::kWednesday: return “Wed”; case Time::kThursday: return “Thu”; case Time::kFriday: return “Fri”; case Time::kSaturday: return “Sat”; } return “(unknown day)”; } void printTime() { // Get the current time and date from the chip. Time t = rtc.time(); // Name the day of the week. const String day = dayAsString(t.day); // Print the time to lcd1602. LCD.setCursor(1, 0); if (t.mon < 10) LCD.print(“0”); //print date LCD.print(t.mon); LCD.print(“-“); if (t.date < 10) LCD.print(“0”); LCD.print(t.date); LCD.print(” “); if (t.hr < 10) LCD.print(“0”); //print time; LCD.print(t.hr); LCD.print(“:”); if (t.min < 10) LCD.print(“0”); LCD.print(t.min); LCD.print(“:”); if (t.sec < 10) LCD.print(“0”); LCD.print(t.sec); //LCD.print(day); } void setup() { rtc.writeProtect(false); rtc.halt(false); LCD.begin(16, 2); //初始化,设置列行 Serial.begin(9600); // Time t(2020, 2, 23, 16, 01, 00, Time::kSunday); // Set the time and date on the chip. // rtc.time(t); } void loop() { while (Serial.available() > 0) { str += char(Serial.read()); delay(2); } if (str.length() > 0) { Serial.println(str); LCD.clear(); LCD.setCursor(0, 1); LCD.print(str); } delay(500); printTime(); str = “”; }
2.树莓派端:要完成获取访问量数据,并将数据通过串口发送出去。
这里要注意,一个是要将API中的token换成自己的;二是注意串口位置可能不同,查看/dev/serial/这个目录下,选择Arduino这个串口,否则数据不通。
代码如下:
#!/usr/bin/python # -*- coding: UTF-8 -*- import serial import requests import time visits = 0 ser = serial.Serial(“/dev/serial/by-id/usb-Arduino_Srl_Arduino_Uno_95536333830351C0D021-if00″,9600) actions_url = ‘https://tongji.lxx1.com/index.php?module=API&method=Actions.get&idSite=3&period=day&date=today&format=JSON&token_auth=d7c***’ print(‘serial test start …’) try: while True: r = requests.get(actions_url) info = r.json() visits = info[‘nb_pageviews’] ser.write(‘Blog visits:%d ‘%(visits)) #通过串口发送数据 time.sleep(60) except KeyboardInterrupt: if ser != None: ser.close()
最后,看一下录的视频效果:
用lcd1602显示博客访问量
原创文章,转载请注明: 转载自科技爱好者博客 本文链接地址: 用树莓派、Arduino和lcd1602显示屏显示博客访问量 (http://www.lxx1.com/3916) 如果博客对您有帮助,请给我 打赏
