
经过了几个通宵和研究,终于把PVE摘除了网线,使用无线网卡来作为网络接入。这里记录一下:
配置环境:极路由4S、TP-Link XDR3050(易展版)、X86小主机(蜗牛星际)
软件环境:Proxmox 7.2.3、Openwrt、群辉DS3617xs、iKuai、Windows 7
一、首先,我家的网络架构图(很复杂,哭~~~)
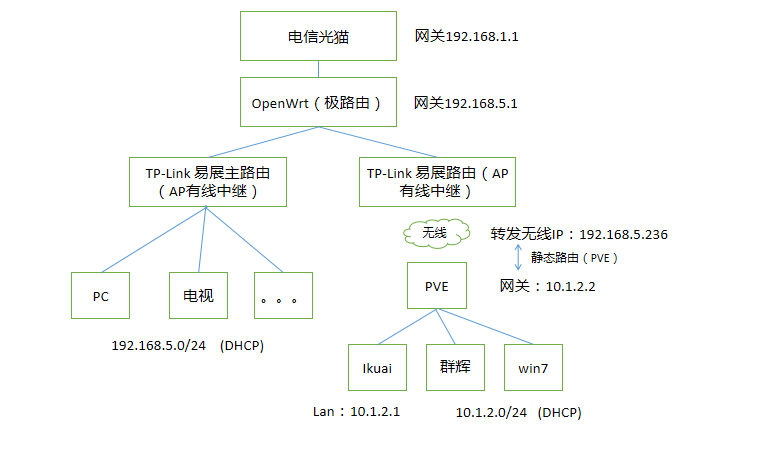
以下准备过程:
1、购买适合自己的路由器刷入OpenWrt接在光猫后面,负责路由和DHCP功能。(根据自己的预算来,可以买几十块的路由器也可以买上千块的软路由),我选择了前者(极路由4S),刷机方法自行了解吧,很多~
2、因为家里有3室2厅2卫,所以一个AP路由不够,买入了TP-LINK XDF3050(易展版)两个,两个都做了有线中继(具体教程也自行了解吧,这里不做重点介绍)~
3、购买一块AX210无线网卡(PCI-E版本),插入在X86主机上后安装Proxmox(PVE),安装教程也自行了解吧~
二、配置PVE+网卡+PVE设置NAT路由【重点】
(1)先看这个人的两篇帖子:
https://www.bilibili.com/read/cv17788151
https://www.bilibili.com/read/cv17999794
(2)【重点来了,这里很关键,也是浪费了我2个通宵的地方】里面有一些NAT配置需要优化一下,以下是我的pve配置文件~(呕心沥血啊)
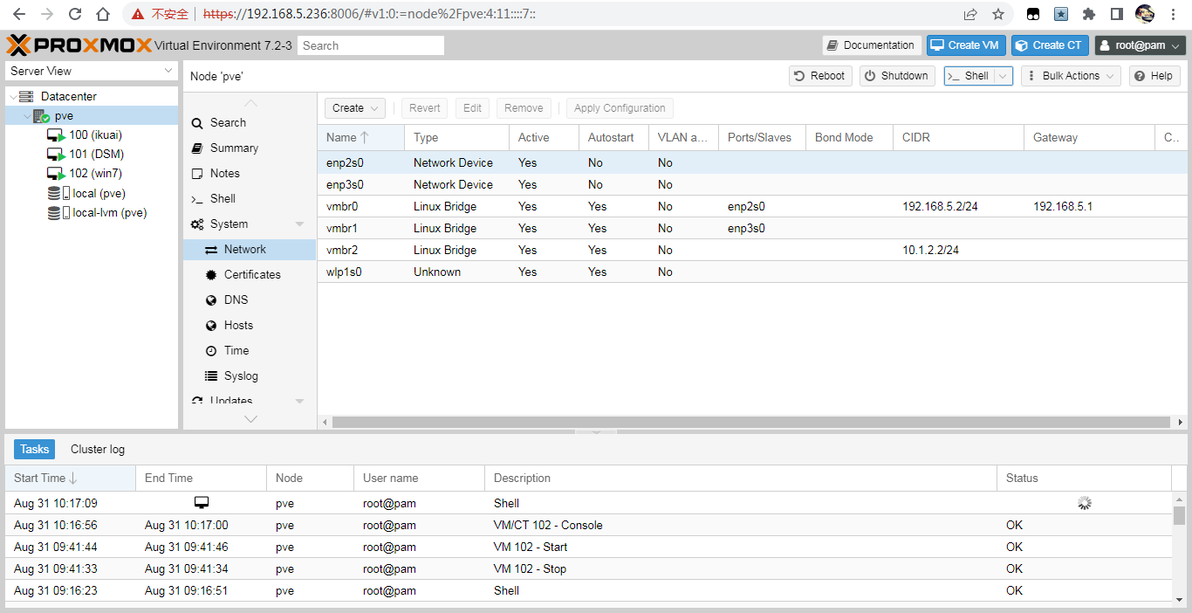
第一个,/etc/network/interfaces 文件,主要配置无线网络和虚拟网络NAT。
# network interface settings; autogenerated
# Please do NOT modify this file directly, unless you know what
# you're doing.
#
# If you want to manage parts of the network configuration manually,
# please utilize the 'source' or 'source-directory' directives to do
# so.
# PVE will preserve these directives, but will NOT read its network
# configuration from sourced files, so do not attempt to move any of
# the PVE managed interfaces into external files!
auto lo
iface lo inet loopback
iface enp2s0 inet manual
iface enp3s0 inet manual
auto vmbr0
iface vmbr0 inet static
address 192.168.5.2/24
gateway 192.168.5.1
bridge-ports enp2s0
bridge-stp off
bridge-fd 0
up route del -net 0.0.0.0/0 gw 192.168.5.1 metric 0 vmbr0
up route add -net 0.0.0.0/0 gw 192.168.5.1 metric 1 vmbr0
up route del -net 192.168.5.0/24 metric 0 vmbr0
up route add -net 192.168.5.0/24 metric 1 vmbr0
auto vmbr1
iface vmbr1 inet static
bridge-ports enp3s0
bridge-stp off
bridge-fd 0
#注意红字配置成自己的内容
auto wlp1s0
iface wlp1s0 inet dhcp
wpa-ssid 你的wifi名称
wpa-psk 你的wifi密码
up route add -net 0.0.0.0/0 gw 192.168.5.1 metric 0 wlp1s0
down route del -net 0.0.0.0/0 gw 192.168.5.1 metric 0 wlp1s0
#注意红字配置成自己的内容
auto vmbr2
iface vmbr2 inet static
address 10.1.2.2/24
bridge-ports none
bridge-stp off
bridge-fd 0
post-up echo 1 > /proc/sys/net/ipv4/ip_forward
post-up bash /root/iptables.config.sh
post-up iptables -t nat -A POSTROUTING -s '10.1.2.0/24' -o wlp1s0 -j MASQUE
RADE
post-down iptables -t nat -D POSTROUTING -s '10.1.2.0/24' -o wlp1s0 -j MASQUE
RADE
第二个,/root/iptables.config.sh 文件,主要是配置静态路由能够真实网络访问虚拟网络。10.1.2.100 是windows7 ,10.1.2.101是群辉。下面红字换成自己环境下的无线网卡ID
#!/usr/bin/env bash
iptables -t nat -A PREROUTING -i wlp1s0 -p tcp --dport 5000 -j DNAT --to-destination
10.1.2.101:5000
iptables -t nat -A PREROUTING -i wlp1s0 -p tcp --dport 135 -j DNAT --to-destination 1
0.1.2.101:135
iptables -t nat -A PREROUTING -i wlp1s0 -p udp --dport 137 -j DNAT --to-destination 1
0.1.2.101:137
iptables -t nat -A PREROUTING -i wlp1s0 -p udp --dport 138 -j DNAT --to-destination 1
0.1.2.101:138
iptables -t nat -A PREROUTING -i wlp1s0 -p tcp --dport 139 -j DNAT --to-destination 1
0.1.2.101:139
iptables -t nat -A PREROUTING -i wlp1s0 -p tcp --dport 445 -j DNAT --to-destination 1
0.1.2.101:445
iptables -t nat -A PREROUTING -i wlp1s0 -p tcp --dport 3389 -j DNAT --to-destination
10.1.2.100:3389
三、验证结果
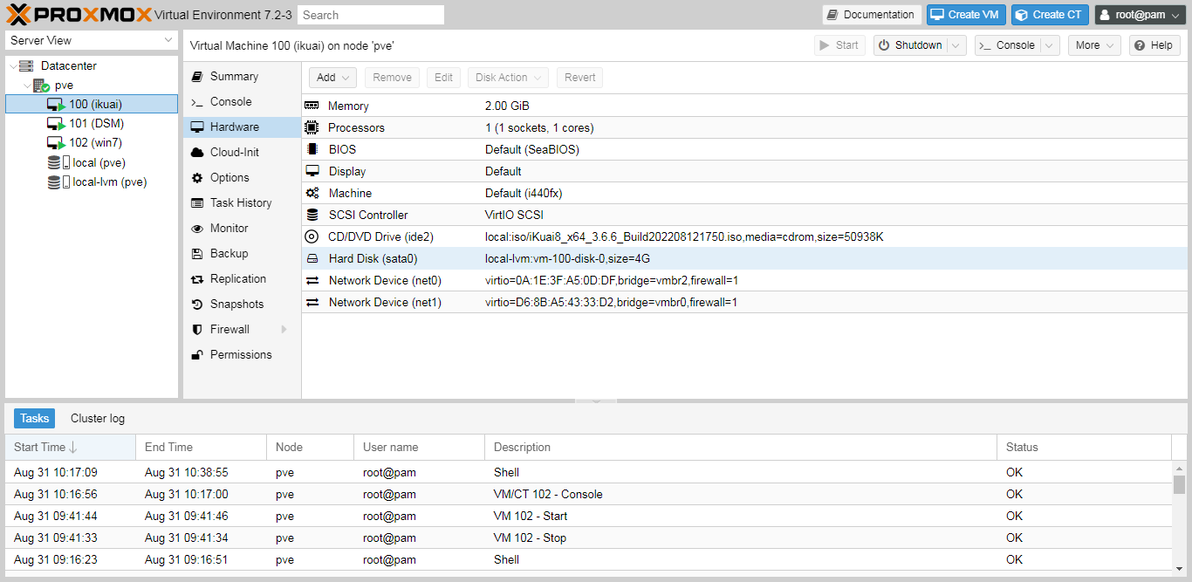
iKuai配置(注意看网卡net0-vmbr2,net1-vmbr0)
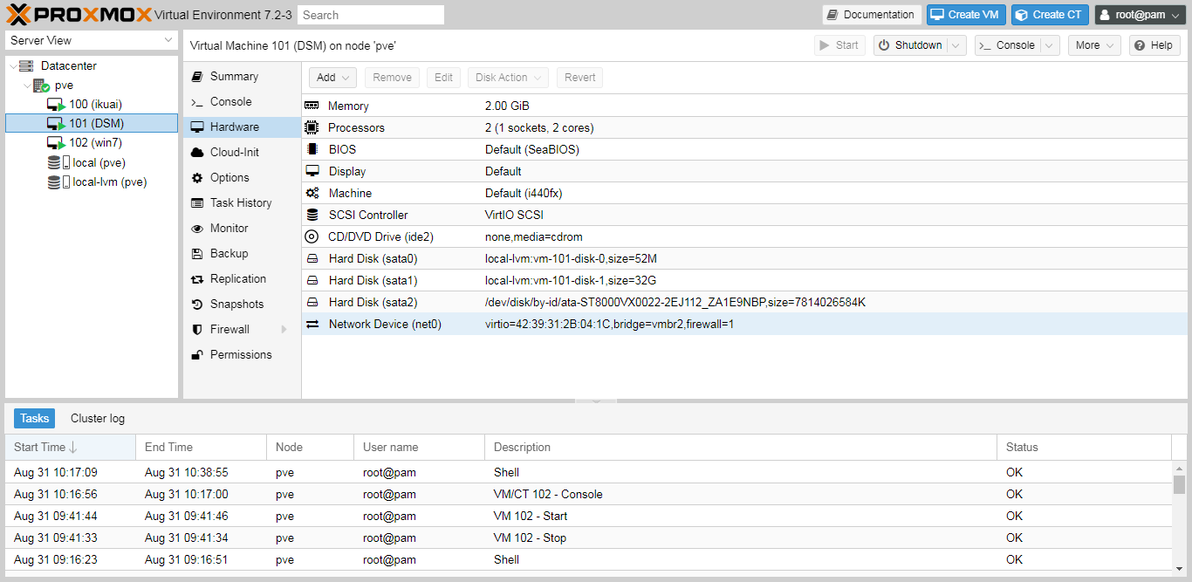
群辉配置(注意看网卡,选择vmbr2)
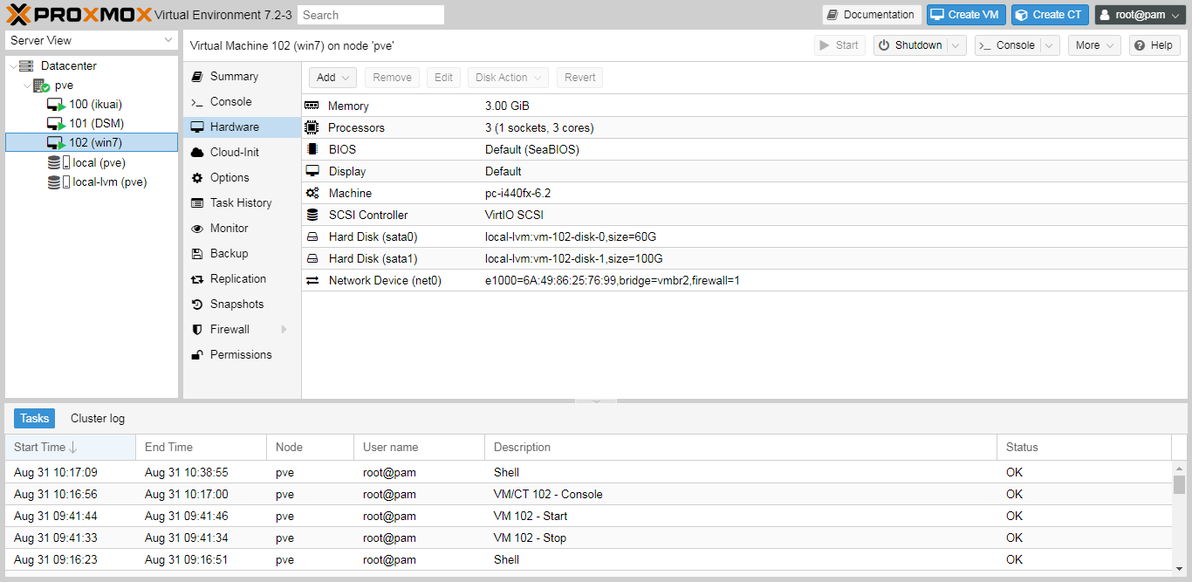
win7配置(注意看网卡,选择vmbr2-E1000,不然速度只有20M)
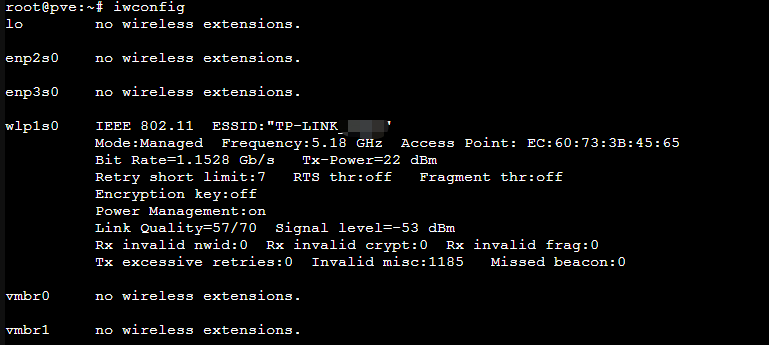
无线接入速度:1.1528 Gb/s (还不错)
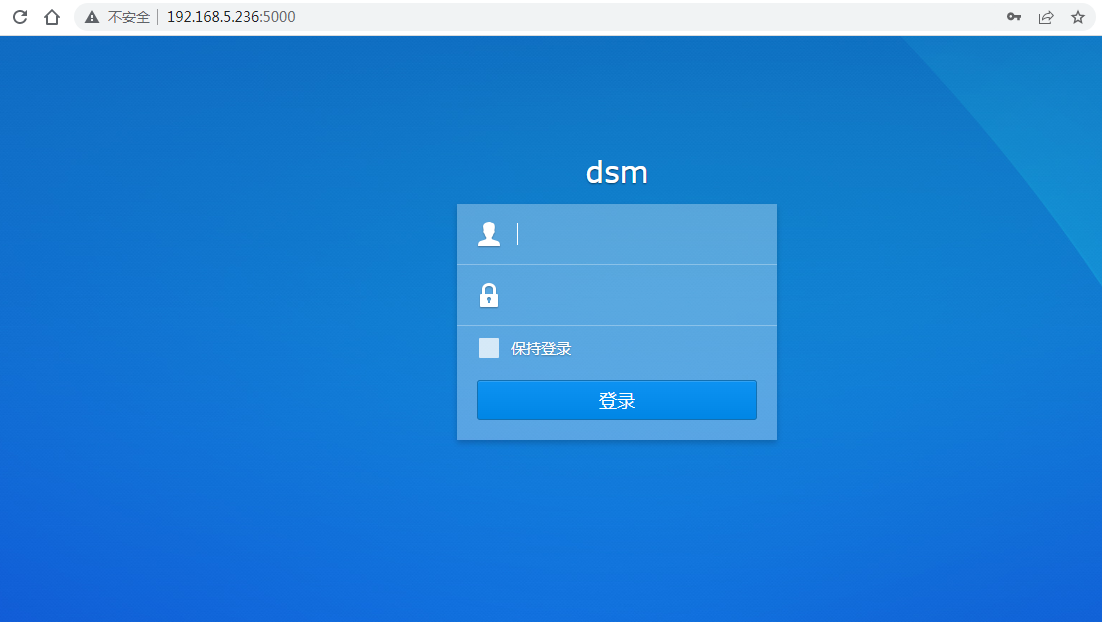
真实网络环境输入:192.168.5.236:5000,这时静态路由已成功访问群辉(10.1.2.101:5000),同样也可以成功远程windows7 (192.168.5.236:3389 -->10.1.2.100:3389)
技术研究告一段落,集大成者的杰作~~~
