
ObjToSchematic
这是什么:一个用于辅助minecraft体素艺术的软件,可以将带有贴图的obj模型文件转化成可导入minecraft的schematic格式。
读完你可以学到什么:ObjToSchematic软件的用法与部分原理

示例 1
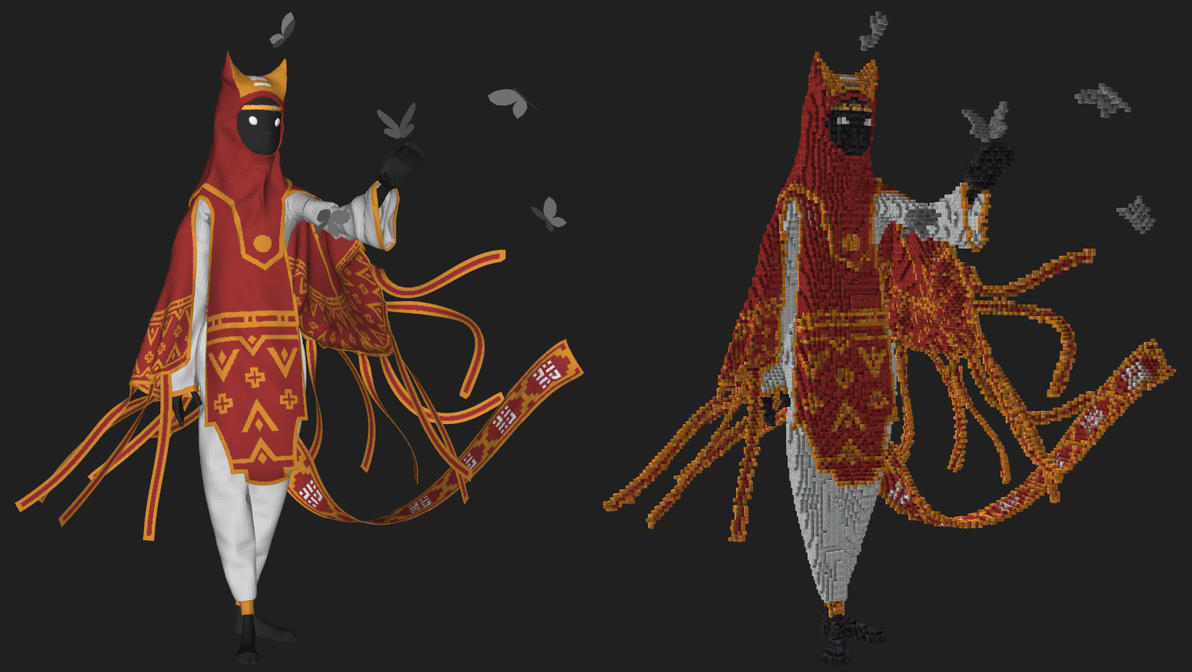
示例 2

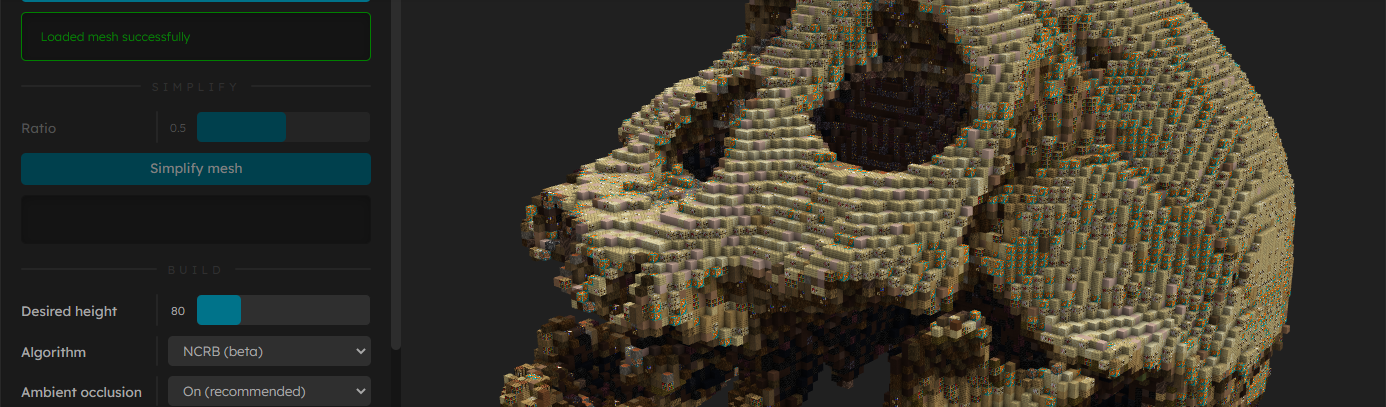
示例 3
获取方式github(如果你能科学的上网),网盘(阅读量>1000放出)
注意事项:
模型只支持obj格式,贴图只支持jpg和png格式
当你的模型特别大的时候,会遇到导入失败,程序卡死的情况
当你的模型的贴图不在正确地方的时候,导入的模型为白色(如果你一直一直一直私信我,并且点赞、投币、收藏、充电,想要知道如何给模型上材质,我可能会出一期视频)
当你不按顺序完成操作的时候,你不能跳步(程序说的,不是我说的!)
如果你读完了注意事项,请按顺序阅读,特别注意标序号的部分
第一步:
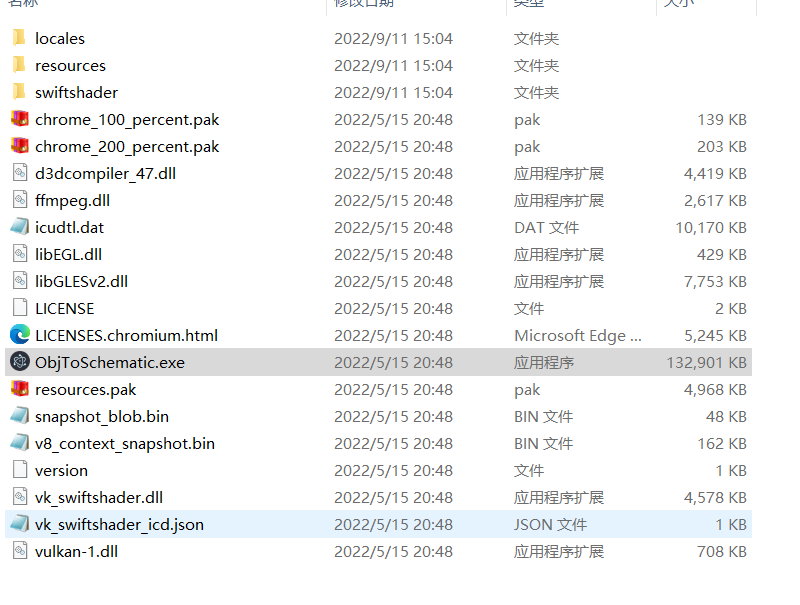
打开exe文件(如果你已经下载好了软件)
!注意:不要删除文件夹中的任何内容,它们对程序很重要

初始界面
按键说明:
!当你在正确的步骤才能使用对应的按键

这些按键是干什么的呢
从左到右依次是:
显示模型,显示体素,显示方块着色效果,缩小视图(-),放大视图(+),恢复视图到初始状态,显示参考地平线,显示坐标轴
显示网格,显示法线,debug
显示模型,显示体素,显示方块选项特别重要
它们可以帮你对比前后效果,从而选择最好的生成方式
第二步:
点击Wavefront .obj file加载模型
点击Load mesh 加载模型
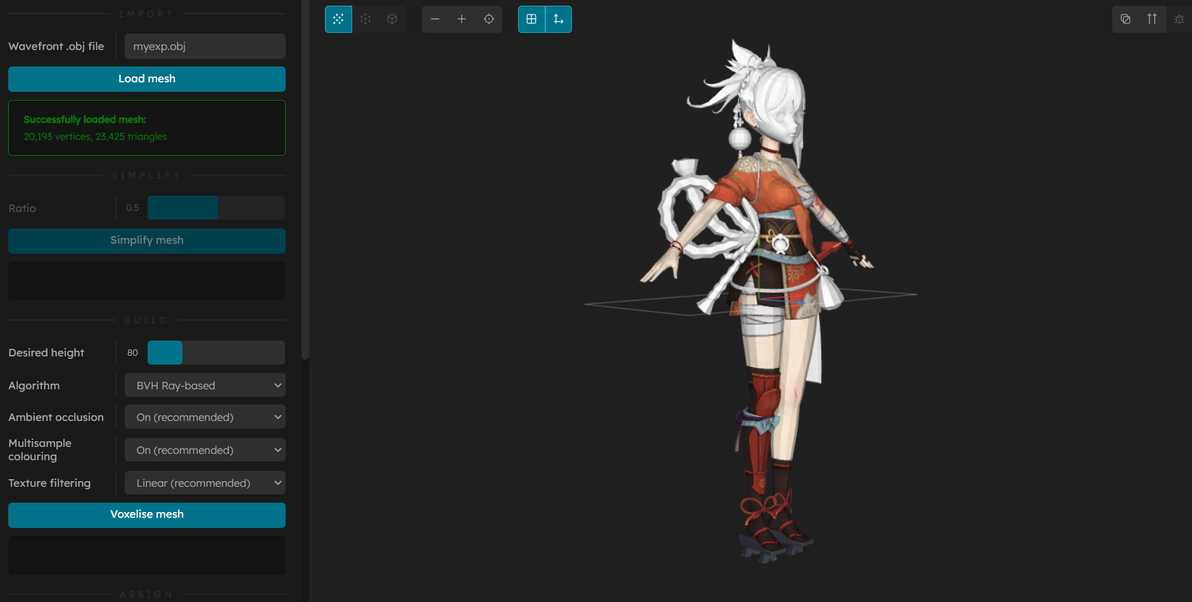
模型加载成功的提示(注意,你下载的模型的贴图可能不在正确的地方,导致模型加载为纯白色,解决方案为在3d软件中重新指派贴图)
第三步:
3. 点击 Voxelise mesh (体素化纹理,这一步将你的文件转化成体素)
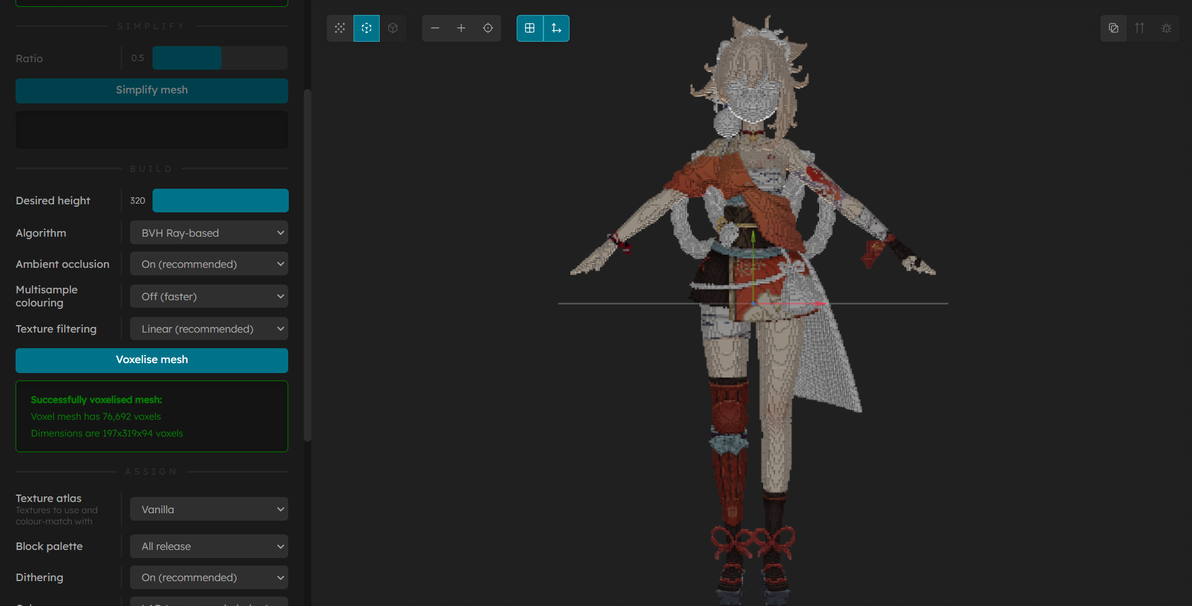
体素化效果
参数翻译:
Desired height: 想要的高度(你可以拖动滑条)
Algorithm: 算法(推荐BVH,其颜色更加锐利)
Ambient occlusion: 环境光遮蔽(提供更加真实的伪装阴影效果,对最终结果无影响,只提供更好的显示效果)
Multisample colouring: 多采样颜色(开启后无差别,建议关闭)
texture filting: 纹理过滤(提供更好的降噪效果)
第四步:
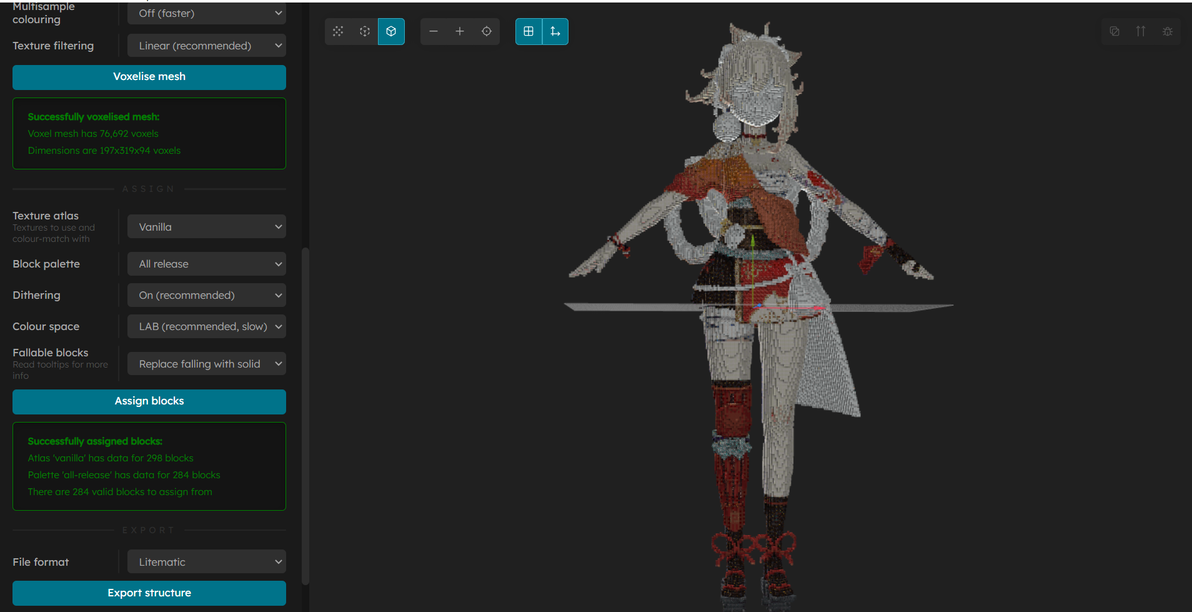
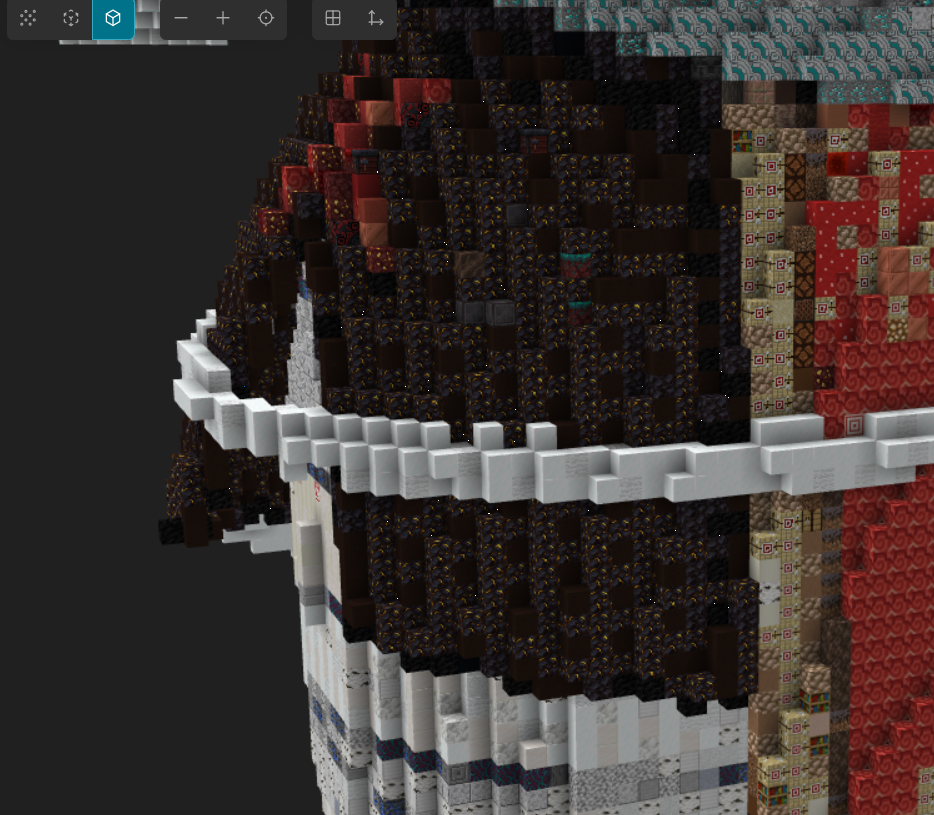
4. 点击Assign block(指派方块)

用鼠标滚轮放大看看
参数翻译:
Texture atlas|Vanilla: 材质图集|平凡的(这里作者试图为可选方块材质分组,但是还没开发完毕,此参数不重要)
Block palette: 方块调色板(非常重要的选项,你可以编辑你想要使用的方块)
Dithering: 吹毛求疵的(非常重要的选项,关系到是否使用“色彩抖动”创造出更多颜色)
Color space: 色彩空间(非常重要的选项,影响生成效果)
Fallable block: 掉落方块(本选项会自动帮你将会掉落的方块(沙子等)替换为不会掉落的方块。相应的,可选择的颜色会更少,关闭后会报warining,提示栏变成橙色)
参数效果与高级用法(如果你急着拿到schematic文件,请跳过本部分):
Color space: 色彩空间:
上方为LAB色彩空间
下方为RGB色彩空间
右侧为原始模型
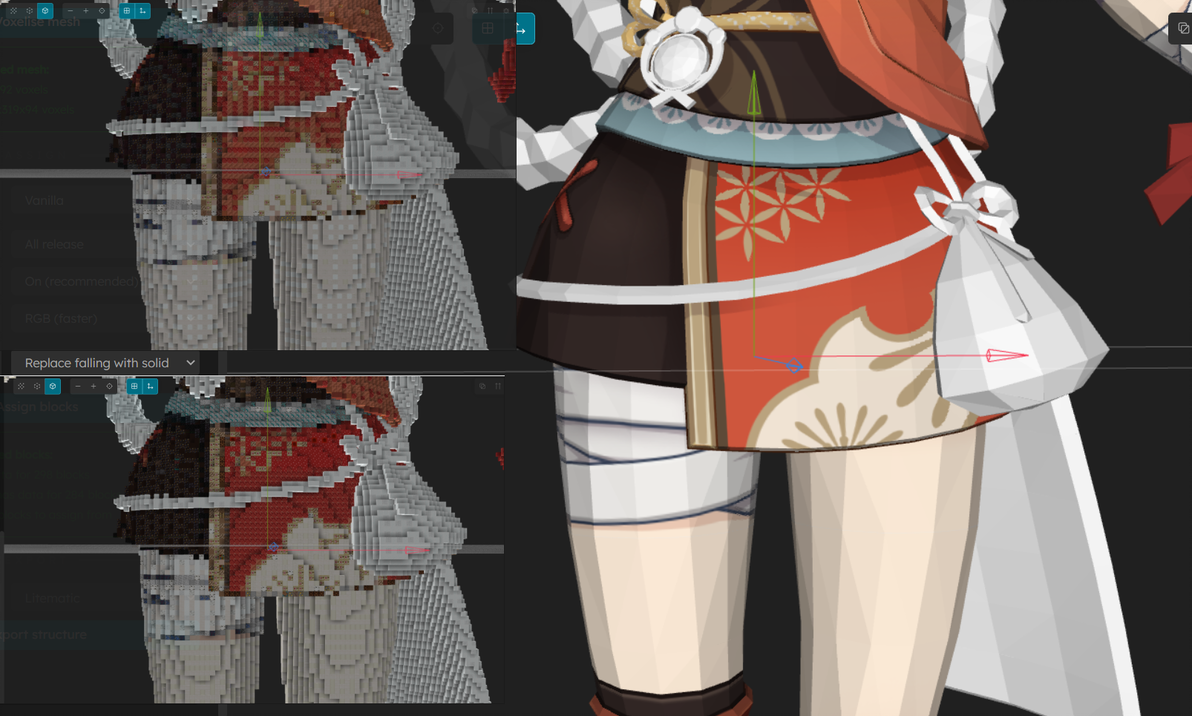
依据个人喜好选择
Dithering: 吹毛求疵的
此选项会创造色彩抖动效果,简单来说是用很少的颜色创造出丰富的视觉效果
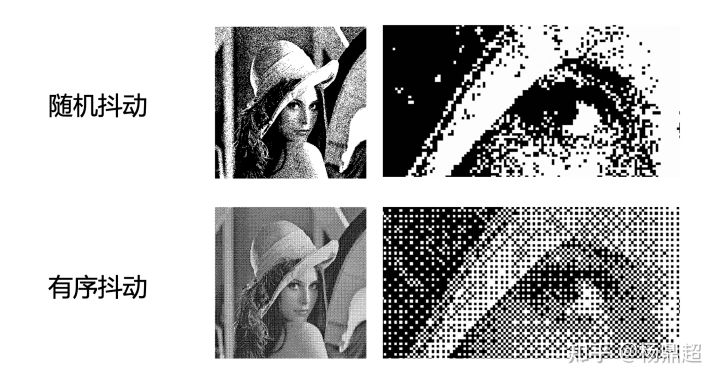
来着知乎的演示图片
开启的效果:
开启的效果,可以看到裙子的部分有颜色混合效果
关闭的效果:

关闭的效果
注意:软件中的抖动是有规律的,会产生网格纹理,关闭会更接近手工的效果
Block palette:方块调色板
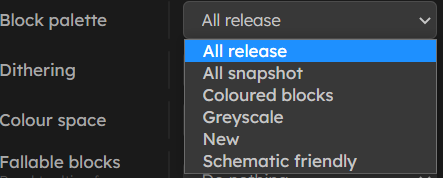
你的下拉栏中不会有new的选项,因为是我加的
你可以控制程序使用的方块创造出自定义的风格化效果,但是注意,使用的方块不会多于一下图片中的文件夹中的atlas文件标注的方块数目,如果想要加入新版本方块,请编辑本文件夹与贴图,但是这部分比较麻烦,在本文中不展示

在本文件夹下可以查看支持的所有材质
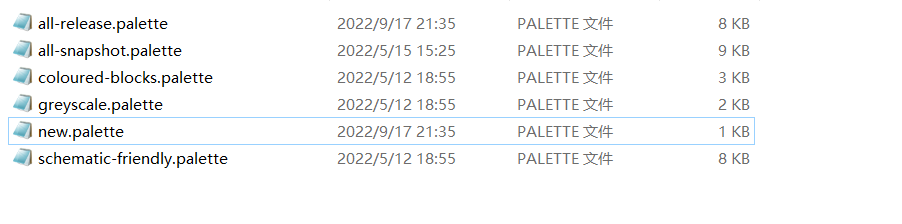
在ObjToSchematic-win32-x64\ObjToSchematic-win32-x64\resources\app\res\palettes文件夹下可找到所有配色方案,当然你也可以创造自己的配色方案。
打开all-release.palette(使用记事本即可),可以看到所有支持的方块,你只需要复制这个文件中的内容:

这是部分
下面我们新建一个txt文件并且把它的后缀改为.palette
这里我建立的是new.palette文件
文件内容如下:
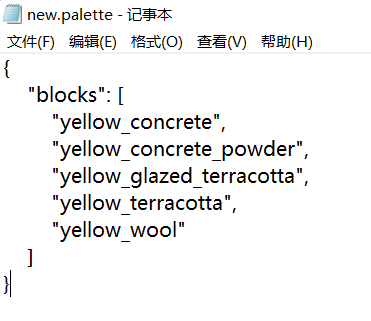
这里我选择了一些黄色方块
重新打开程序或者reload,重复上文的所有步骤,在 Block palette选项中就可以找到你想要的配色方案。
下面是结果:

在resources\app\res\palettes中添加一个new.palette文件(这是一个文本文件,可以用文本编辑器编辑)
第五步:
5. 在File format选项中将导出格式设置为Schematic, 点击Export structure

导出演示
恭喜你学会了,请交学费(bushi
感谢Lucas Dower先生的优秀作品

github上的项目介绍(我不想翻译它了,你们自己看看哦)
github仓库连接 --> github.com/LucasDower/ObjToSchematic
ObjToSchematic
A visual tool to convert 3D .obj models into Minecraft structures (.schematic, .litematic, .schem, .nbt) Usage • Progress • Disclaimer • Contributing • Gallery
"Homo erectus georgicus" (https://skfb.ly/6ADT8) by Geoffrey Marchal is licensed under Creative Commons Attribution-NonCommercial (http://creativecommons.org/licenses/by-nc/4.0/).
Usage
You can either download the latest release[github.com/LucasDower/ObjToSchematic/releases] or if you want the latest features you can build it yourself by following the instructions below.
Download and install Node.js.
Run git clone https://github.com/LucasDower/ObjToSchematic.git in your command line.
Navigate to /ObjToSchematic-main.
Run npm install.
Run npm start.
Advanced
Block Palettes(方块调色板)
You can create your own block palettes to fit the build you desire. When you select this palette, the generated structure will only use the blocks defined in your palette. To create a palette, list every block you want to use in . A list of every supported block can be found in . When your list is complete, run , (make sure you run before the first time you do this). If everything is successful, the next time you run the program you'll be able to select your new palette in the 'Block palette' dropdown.
Texture Atlases(材质包)
If you play Minecraft with a resource pack, you will probably want to build your own texture atlas. This way the program will use the same resource pack for its visualisation and more accurate colour-to-block conversions can be made. To do this, run (make sure you run before the first time you do this) and follow the instructions. If everything is successful, the next time you run the program you'll be able to select your resource pack in the 'Texture atlas' dropdown.
Headless(不需要图形界面运行)
If you want to use the program without using the GUI, you can edit and run (make sure to run after each time you edit the ).
Progress(进度)
0.1
🟢 .json model loading
🟢 Model voxelisation
🟢 Optimised voxelisation & rendering overhaul
🟢 Basic .obj file loader UI
0.2
🟠 Greedy voxel meshing (Removed)
🟢 Export to schematic
0.3
🟠 Voxel splitting (Removed)
🟢 Ambient occlusion
🟢 Quality of life
Model PSR, height limit warnings
🟢 .mtl support for block choice
PNG support, JPEG support
🟢 Convert to TypeScript
0.4
🟢 Block choice exported
Export to .litematic
🟢 Support for non-uniform block models (i.e. not all sides have same texture e.g. Oak Log, Crafting Table)
🟢 UI Redesign
🟢 Optimised ambient occlusion
🟢 Transition to ray-based voxelisation
🟢 Dithering
0.5
🟢 Load custom block palettes and texture atlases
Added custom tool scripts for building atlases and palettes
🟢 Major refactor for extendibility
New interfaces: IImporter, IVoxeliser, IBlockAssigner, IExporter
🟢 QoL editor impovements
Switch between Mesh/Voxel Mesh/Block Mesh rendering, zoom accessibility options, camera translation/centreing
Debug draw options: grid, wireframe, normal, voxel algorithm debug
🟢 Headless launch option
🟢 New voxelising algorithms
Normal-corrected ray-based (NCRB)
BVH-accelerated ray-based
🟢 Optimise construction of voxel mesh vertex buffers
🟢 Buffer refactor to support OES_element_index_uint WebGL extension (support for uint32 index buffers instead of uint16)
0.6
🟢 Options for handling falling blocks and overlapping voxels
🟢 Sponge schematics exporter (.schem)
🟢 Structure blocks exporter (.nbt)
⚪ Support for simplifying complex meshes
🟡 Web workers (see web-workers)
Progress bar
Prevent UI hanging
🟢 Alpha support
Alpha texture maps
Transparent blocks
⚪ Importers for .fbx and .gltf
0.7
⚪ Node.js C++ addons
⚪ Block painting
⚪ Building guides
⚪ Slice viewer
⚪ Support for non-block models (e.g. slabs, stairs, trapdoors, etc.)
Disclaimer
⚠️ This repo is in development and proper error handling is not currently my priority. Contributions are welcome.
This is an non-commercial unofficial tool that is neither approved, endorsed, associated, nor connected to Mojang Studios. Block textures used are from Minecraft and usage complies with the Mojang Studios Brand And Assets Guidelines.
Contributing
Any contributions are welcome, just fork and submit a PR! Just make sure the code style follows the rulings in the and pass the CI build task.
Currently there's not much docs but if you're looking for where to get started, look at and follow , , , , and . If you're looking to add elements to the UI, look at , I'm not using a UI framework because I'm a nutter. Adding more file formats to import from and export to would be nice. Adding new default block palettes would be great also.
If you have any questions or need help getting started then feel free to join the Discord or message me SinJi#4165.
Debugging
To allow for your favourite debugging tools like breakpoints and call stacks, I've included launch options for debugging in VSCode. Use , and run "Debug Main Process" and once the Electron window has initialised, run "Attach to Render Process".
Gallery
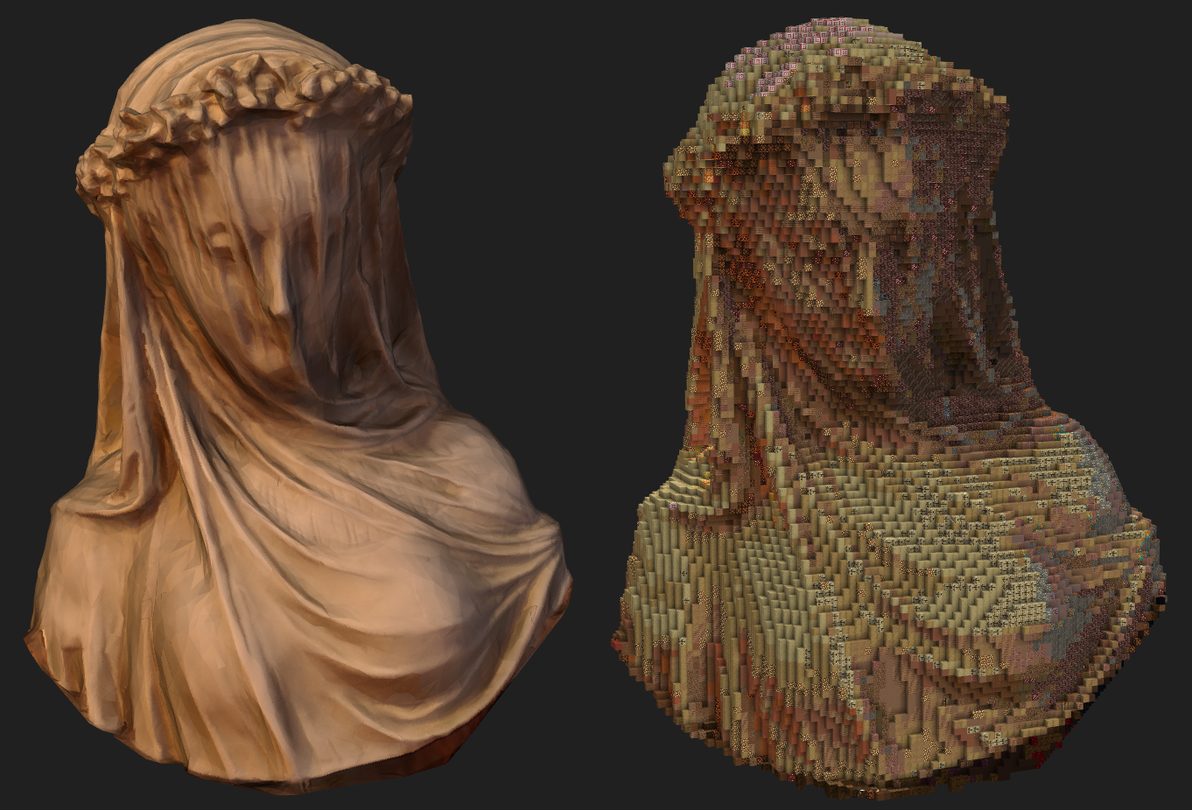
"Creepy Lady Bust Statue Scan" (https://skfb.ly/6B7pK) by alex.toporowicz is licensed under Creative Commons Attribution (http://creativecommons.org/licenses/by/4.0/).
"Cut Fish" (https://skfb.ly/orWLC) by Suushimi is licensed under Creative Commons Attribution-NonCommercial (http://creativecommons.org/licenses/by-nc/4.0/).
"Pivot Demo: Journey" (https://skfb.ly/6WCIJ) by Sketchfab is licensed under Creative Commons Attribution (http://creativecommons.org/licenses/by/4.0/).
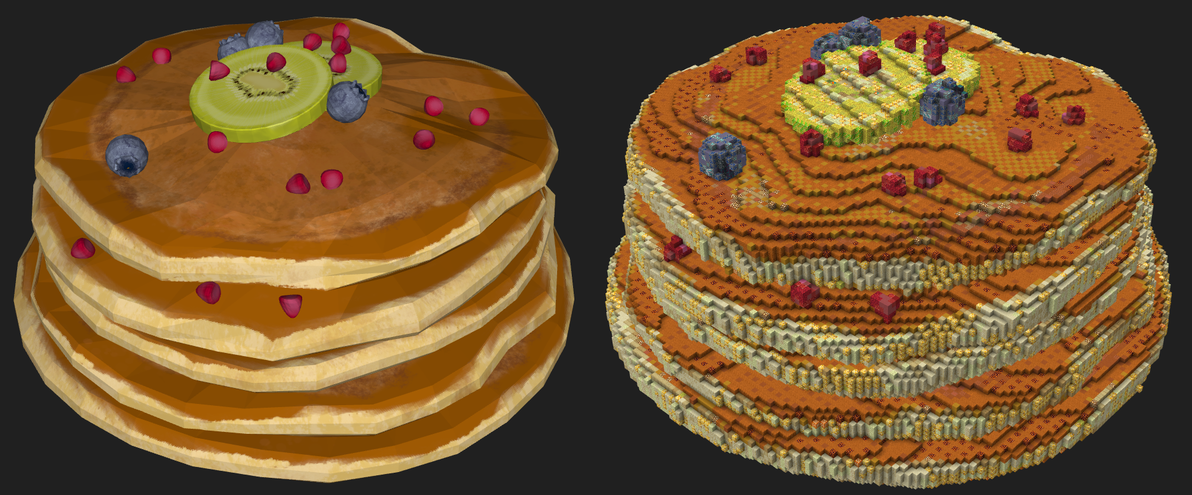
"Handpainted Pancake" (https://skfb.ly/6T7yN) by Marvi is licensed under Creative Commons Attribution (http://creativecommons.org/licenses/by/4.0/).
后记
!注意:本文只讨论技术,这个软件是一个极好的程序开发案例,涉及光线追踪领域的很多算法,涉及openGL而且开放了vertex shader 和 fragment shader供用户编辑(如果你会的话),因此是极为优秀的学习案例。
技术不能代替人工,但是可以为艺术家解决一些繁琐的操作,辅助创意的实现,不提倡用程序生成的结果代替创意的实现。
艺术家应该与时俱进,学习最新的科学技术,使用科学而现代的方法创作出杰出的当代作品
由于编者水平有限,文章篇幅有限,不能一一介绍原理与操作方法,错误与不妥之处在所难免,敬请读者批评指教。
编者
2022年9月
