
本文参考:[Aseprite终极白嫖教程](https://blog.csdn.net/purlifed/article/details/109343365)
本文gitpage地址:https://r4p0.github.io/blog/2022/06/22/build_aseprite_from_github
0. 前言
叠甲:以下会有一大段介绍(其实就是废话时间)。如果前期准备都完成了,想直接看编译指南的话可以跳转到编译部分,本文仅包含Windows的编译(别问,问就是买不起Mac)。

aseprite官网图片
Aseprite是一种专有的,源可用的图像编辑器,主要用于像素画图和动画。它可以在Windows,macOS和Linux上运行,并具有用于图像和动画编辑的不同工具,例如图层,框架,tilemap支持,命令行界面,Lua脚本等。 原文来自:Aseprite 维基百科(https://en.wikipedia.org/wiki/Aseprite)
使用Aseprite可以更便捷的做出像素风格的图片及Gif

可以在其官网(https://www.aseprite.org/#buy)或Steam商城(https://store.steampowered.com/app/431730/Aseprite)购买并支持该软件,售价在 $19.99 (折合大约120~130软妹币左右)。
根据官方推荐软件在Windows平台运行至少要120MB内存和40MB的存储空间(都2202年了我不信有电脑跑步起来🤣)。
当然作为种花家的白嫖党们,肯定希望能够白嫖获得如此好用的软件。官方很贴切的提供了开源代码(https://github.com/aseprite/aseprite),方便学生党、白嫖党以及经济能力不足人来使用Aseprite。
并且官方贴心地还在其FAQ(https://www.aseprite.org/faq/)中特地指出,即使是自行编译的版本(就是下面要介绍的白嫖版本)所产出的作品都可以用于个人或商业使用。原文:Yes, you can use your own creations (sprites, animations, graphics, assets, etc.) in any product (personal or commercial) you want. Even with compiled versions of Aseprite you can create art for your personal/commercial purposes.(https://www.aseprite.org/faq/#can-i-sell-graphics-created-with-aseprite)
所以白嫖党们可以放心使用。如果很喜欢这个软件,并且想支持一下开发者,完全可以先上车后补票。
1. 准备阶段
1.0 Aseprite
首先需要在Github上Clone(https://github.com/aseprite/aseprite)或下载Release版的Aseprite代码,下载地址:https://github.com/aseprite/aseprite/releases
由于一些国情原因GitHub访问速度一直不太稳定Git经常链接断断续续,外加不是所有人都会用Git。这里推荐下载Release版。至于速度问题网上有很多解决方案如油猴插件之类的个人一直使用serctl的加速。
下载完解压,这里以解压到 D:\Aseprite,这里以 Aseprite-v1.3-beta16-Source.zip 为例解压后根目录结构如下。
D:\Aseprite
├─.github
├─cmake
├─data
├─docs
├─laf
├─src
├─third_party
├─.clang-format
├─.clang-tidy
├─.gitignore
├─.gitmodules
├─CMakeLists.txt
├─CODE_OF_CONDUCT.md
├─CODEOWNERS
├─CONTRIBUTING.md
├─EULA.txt
├─INSTALL.md
└─README.md在根目录找到[INSTALL.md](https://github.com/aseprite/aseprite/blob/main/INSTALL.md),这个文件是官方推荐的安装教程(只是写的过于专业,程序员可能比较容易理解,对小白不太友好)。
其中对编译准备阶段比较重要的就是这段
# Dependencies

To compile Aseprite you will need:

* The latest version of [CMake](https://cmake.org) (3.16 or greater)
* [Ninja](https://ninja-build.org) build system
* And a compiled version of the `aseprite-m102` branch of
  the [Skia library](https://github.com/aseprite/skia#readme).
  There are [pre-built packages available](https://github.com/aseprite/skia/releases).
  You can get some extra information in
  the [*laf* dependencies](https://github.com/aseprite/laf#dependencies) page.

## Windows dependencies

* Windows 10 (we don't support cross-compiling)
* [Visual Studio Community 2022](https://visualstudio.microsoft.com/downloads/) (we don't support [MinGW](#mingw))
* The [Desktop development with C++ item + Windows 10.0.18362.0 SDK](https://imgur.com/a/7zs51IT)
from the Visual Studio installer我们分别需要准备公共依赖环境和打包平台依赖环境,这里只介绍Windows平台上的依赖
根据上文我们需要准备以下依赖(多数都是GitHub库):
1.1 CMake
官网:https://cmake.org
根据文档要求3.16以上的版本,无脑下最新的就行了。下载地址:https://cmake.org/download/
安装时千万记得要选择全局添加Path,默认是不添加Path的,当然程序员可以自行添加{安装目录}\bin下到Path
安装目录没啥要求这里以D:\Program Files\CMake为例
D:\Program Files\CMake
├─bin
├─doc
├─man
└─share
1.2 Ninja
官网:https://ninja-build.org/
下载ninja-win.zip文件,地址:https://github.com/ninja-build/ninja/releases
下载后解压Ninja.exe到某个地方方便寻找即可,这里以D:\AsepriteDependencies为例
D:\AsepriteDependencies
└─Ninja.exe1.3 Skia
这里需要下载Aseprite魔改后的Skia库:https://github.com/aseprite/skia
下载Skia-Windows-Release-x64.zip文件,地址:https://github.com/aseprite/skia/releases
下载后解压到一个空的文件夹中即可,这里以D:\AsepriteDependencies\Skia为例
D:\AsepriteDependencies\Skia
├─include
├─modules
├─out
├─src
└─third_party1.4 Visual Studio
官方推荐2022的版本,经测试VS2019完全可以,如果本地有其他版本可以先尝试一下,不行再使用其他版本。
官方下载渠道:[Visual Studio 最新版本](https://visualstudio.microsoft.com/downloads/),另外也可以在[MSDN I tell you](https://msdn.itellyou.cn/)进行下载。白嫖用户推荐下载社区版(免费的)
下载完会得到的是一个1.xMB左右的下载器文件VisualStudioSetup.exe,安装Visual Studio Installer
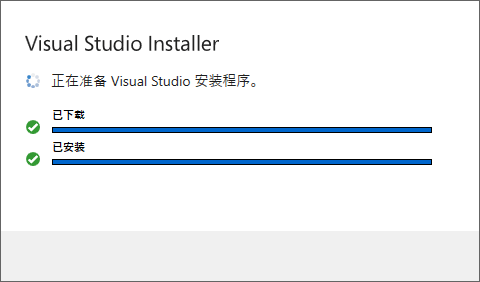
安装Visual Studio Install
在工作负荷中选择使用C++的桌面开发,并且在安装详细信息中去除不必要的可选项。Windows 10 SDK相关可以删除(下一步会提到需要选择指定的版本),用于Windows的C++ CMake工具和适用于最新v142生成工具C++ ATL(x86)建议保留
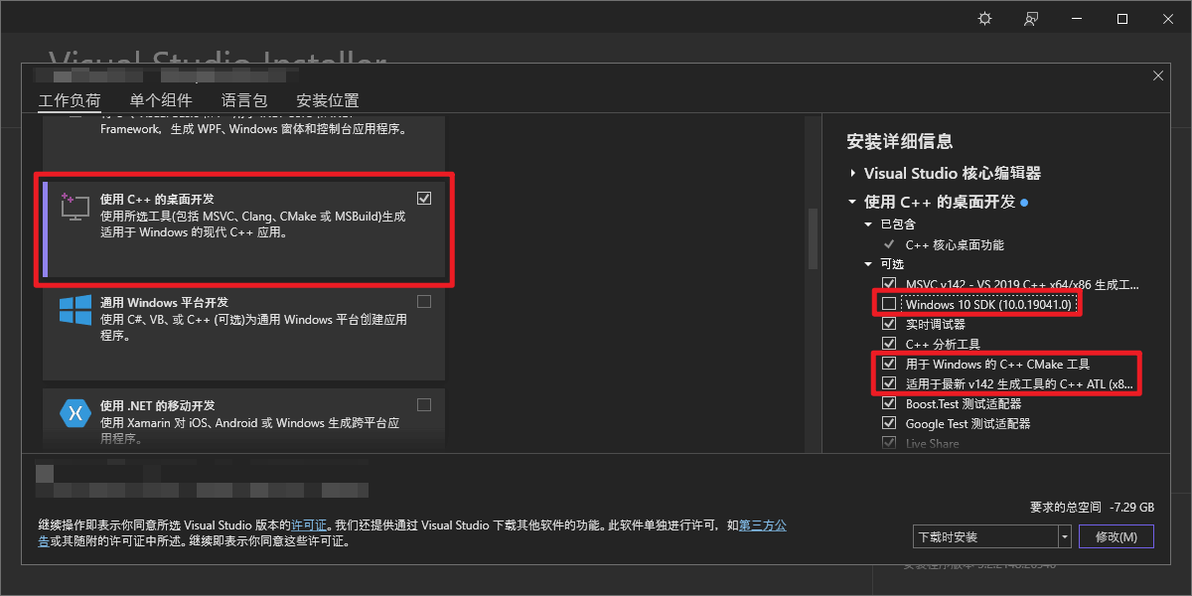
安装C++相关环境
在单个组件中搜索并添加Windows 10 SDK (10.0.18362.0)。
一定要选这个版本!
一定要选这个版本!!
一定要选这个版本!!!
别问我为啥这样强调,都是心酸都是泪啊😭
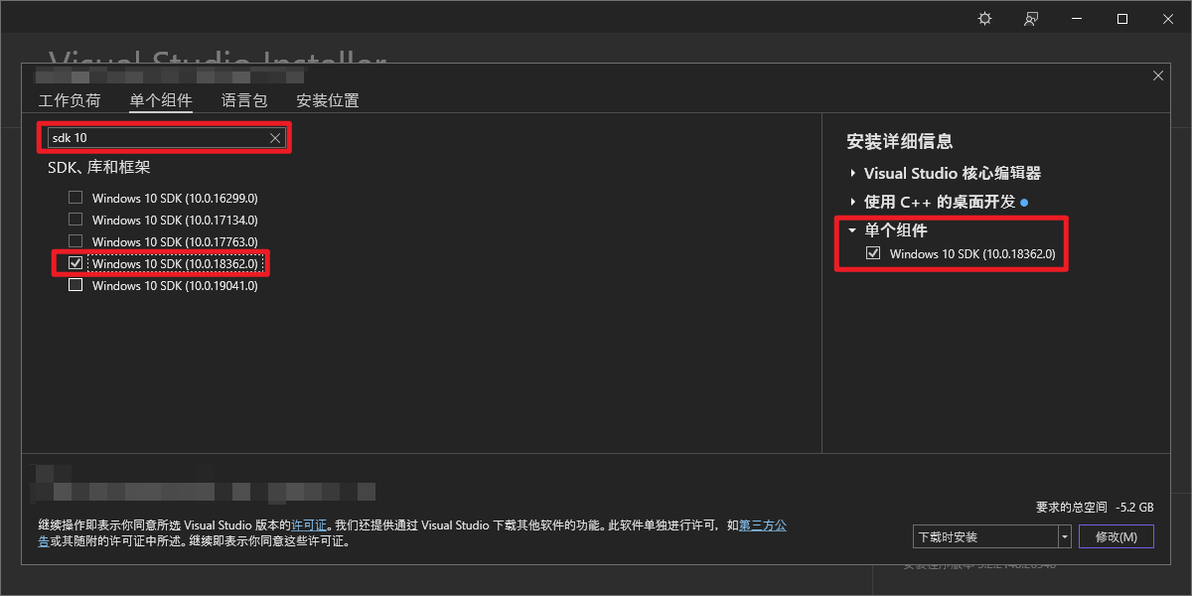
安装Win10 SDK
安装位置可以自行决定这里以C:\Program Files (x86)\Microsoft Visual Studio\2022\Community为例
编译
这里推荐将所有编译用到的命令做成一个Bat文件方便Aseprite进行更新(理论上只需要替换Aseprite工程目录即可)
新建一个bat文件命令如下,小白可以直接新建一个记事本文件将其后缀改为bat,以build.bat为例
将一下bat指令全部拷贝至build.bat并且保存
:: !!请用管理员权限运行!!
@echo off
:: ============配置部分自行修改============
:: VsDevCmd.bat文件位置
set VSDEVC="C:\Program Files (x86)\Microsoft Visual Studio\2022\Community\Common7\Tools\VsDevCmd.bat"
:: (Aseprite)[https://github.com/aseprite/aseprite/releases]
set ASEPRITE="D:\Aseprite"
:: (Skia)[https://github.com/aseprite/skia/releases]
set DSKIA="D:\AsepriteDependencies\Skia"
:: (Ninja)[https://github.com/ninja-build/ninja/releases]
set NINJA="D:\AsepriteDependencies"
:: ============分割线============


:: ============以下谨慎修改============
set PATH=%NINJA%;%PATH%
call %VSDEVC% -arch=x64
cd /d %ASEPRITE%
if exist build rd /s /q build
mkdir build
cd build
cmake -DCMAKE_BUILD_TYPE=RelWithDebInfo -DLAF_BACKEND=skia -DSKIA=%DSKIA% -DSKIA_LIBRARY_DIR=%DSKIA%\out\Release-x64 -DSKIA_LIBRARY=%DSKIA%\out\Release-x64\skia.lib -G Ninja ..
ninja aseprite
echo Finish
if exist bin explorer bin
pause分别替换VSDEVC、ASEPRITE、DSKIA、NINJA的路径
右键用管理员权限执行build.bat
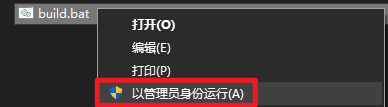
管理员权限运行批处理
等待编译完成,如果成功会打开bin目录,执行aseprite.exe就能愉快的使用了,你可以将整个bin目录移动并重命名到任意位置,方便使用。
可以愉快的玩耍了

Aseprite欢迎页面
更新日志:
2022/07/07:添加解压后的目录结构
