

本文在我博客 https://www.wqzs.vip/index.php/doh_on_windows/ 中同步发布
为什么要使用加密DNS(DoH)
由于部分运营商网络的问题,很多宽带自带的DNS存在劫持问题,甚至某些宽带存在劫持53端口,直接强制使用运营商DNS。这就有可能会造成DNS解析结果的异常或者污染,也有可能具有个人隐私泄露的风险。所以,要防止DNS污染,就需要使用加密DNS,对DNS请求的过程全程加密,这样运营商即使获取到了你的数据包,也无法对其解密,更无法对其进行修改。这篇文章将会教你如何将你的Windows设备接入DNS服务商提供的公共加密DNS服务
前置条件
1.系统要求:Windows 10 build19628及以上,建议Windows11
设置步骤
本文以Windows11为例(因为我已升级至Windows11,目前身边没有Windows10设备)
大概方法 :
设置--网络&Internet--WLAN/以太网
WLAN--硬件属性--编辑DNS设置--手动--开启IPv4和IPv6--填写dns地址
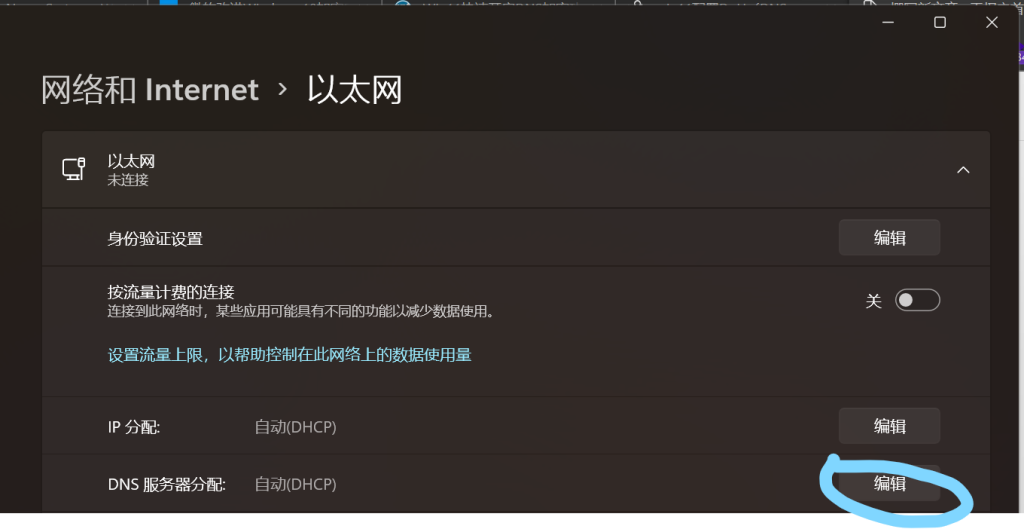
以太网--DNS服务器分配--手动--开启IPv4和IP v6--填写dns地址
详细步骤
1.在开始菜单中打开设置

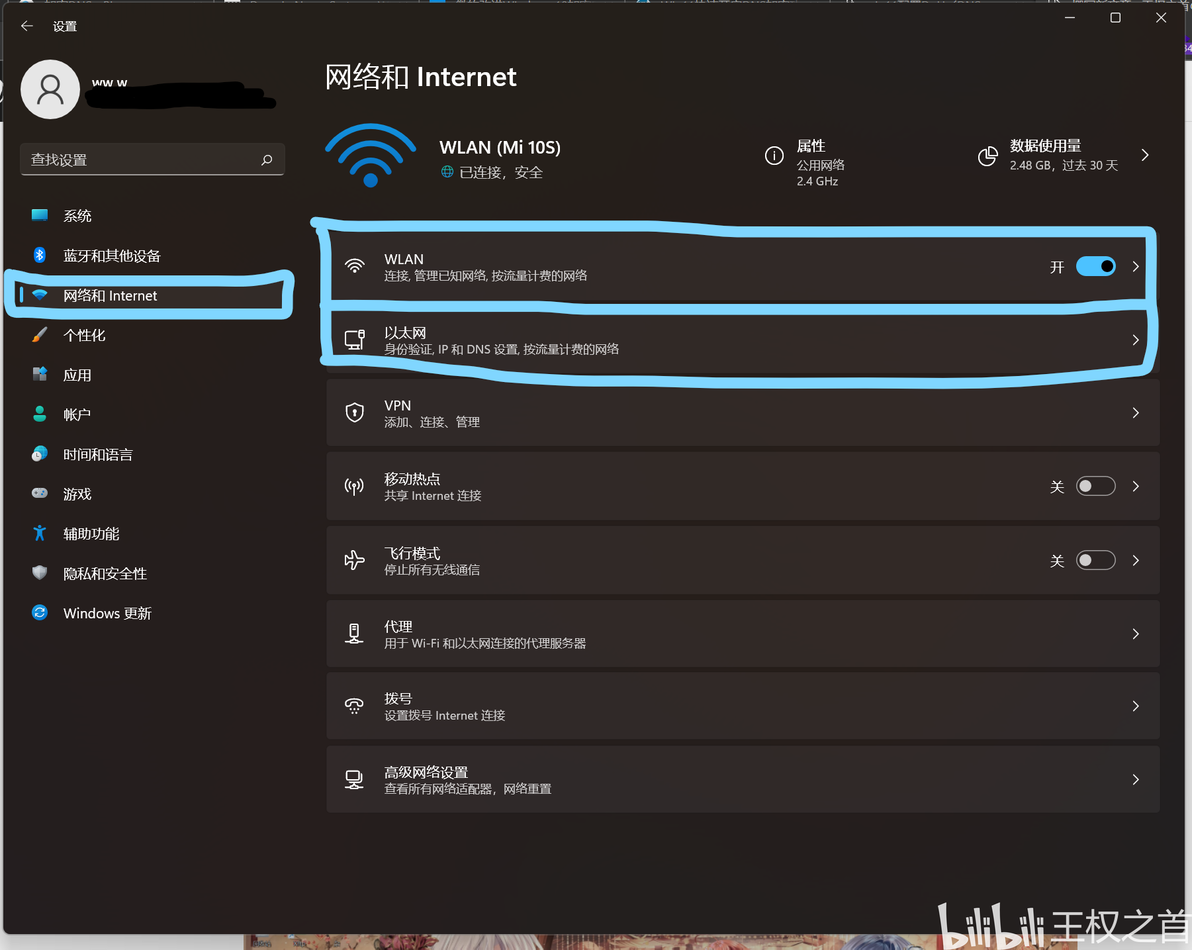
2.进入网络和Internet 然后选择你所连接的网络(WLAN or 以太网)
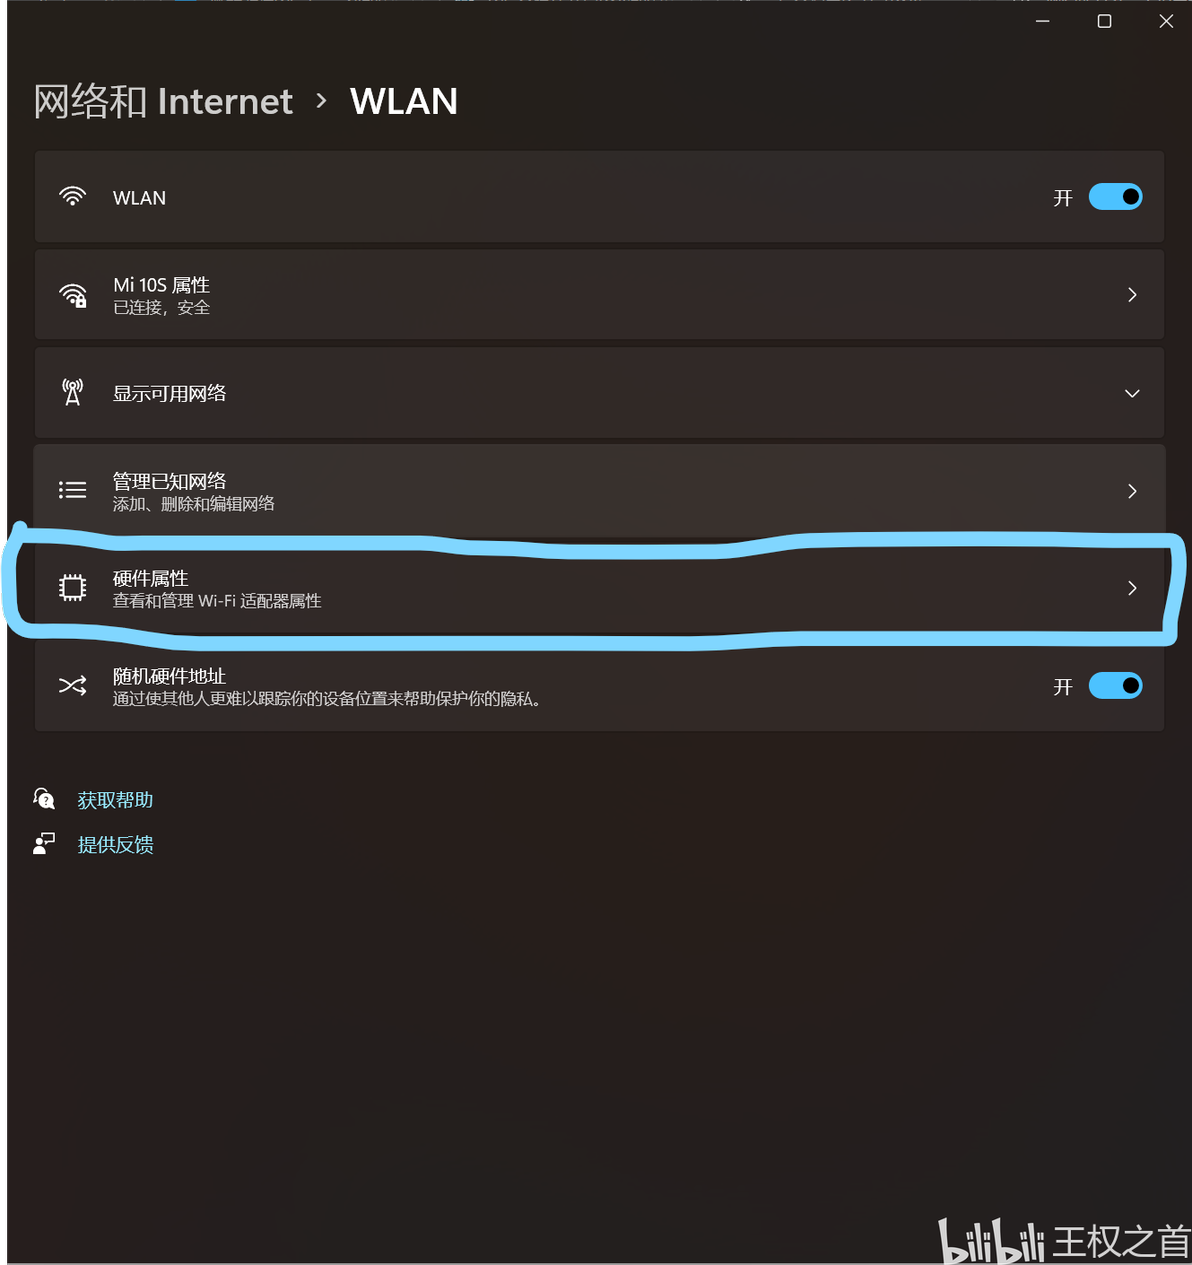
3.点击硬件属性(以太网不需要走这一步)
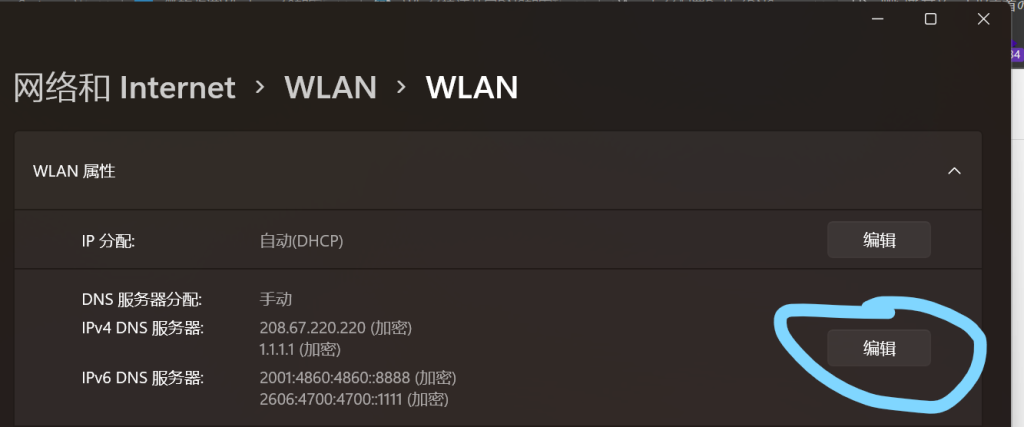
4.找到DNS服务器分配,然后点击编辑
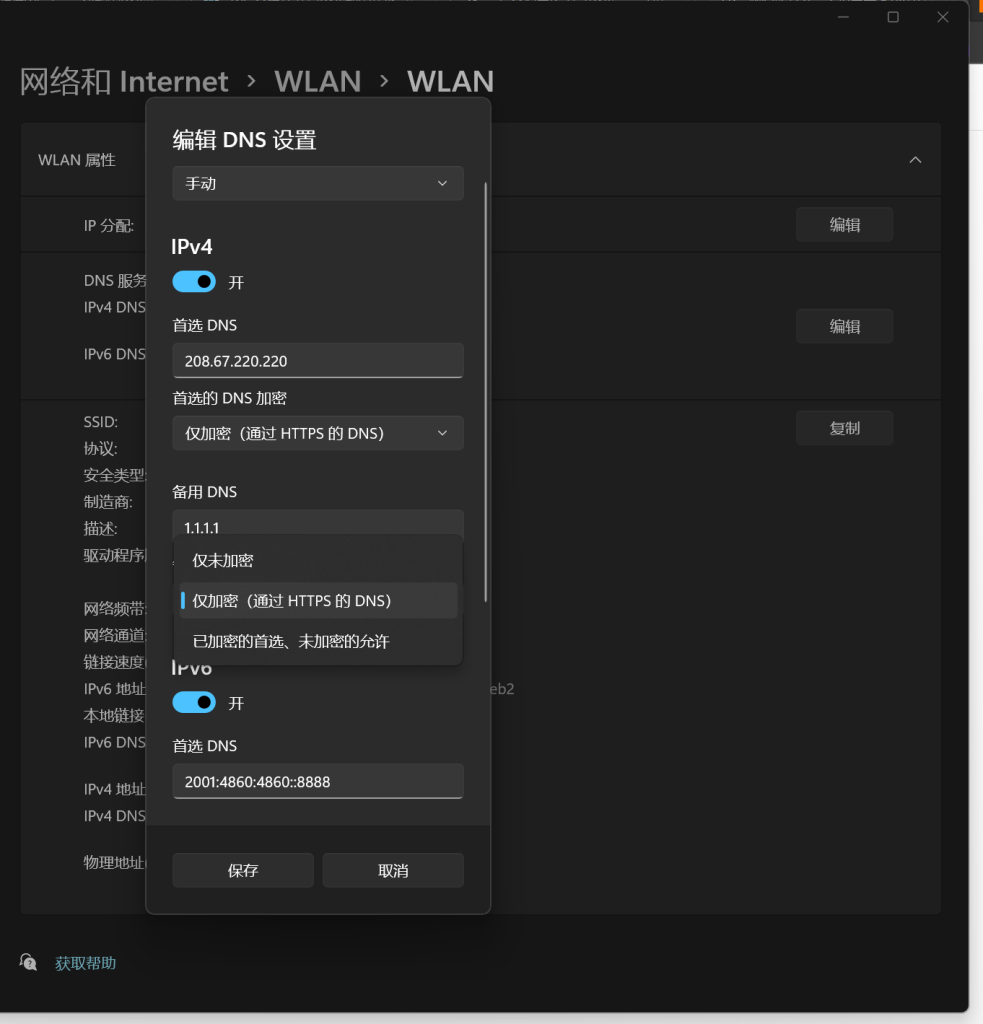
5.将DNS获取方式从DHCP改为手动
6.输入你想用的DNS服务器(这里推荐cloudflare的1.1.1.1和Google的8.8.8.8,文章末尾还有其他推荐的)
7.添加你所选的DNS服务器到WindowsDNS列表(8.8.8.8和1.1.1.1等权威DNS提供商不需要这一步)
因为Windows默认认证的DNS少的可怜,所以需要手动将DNS服务器加入Windows服务器列表
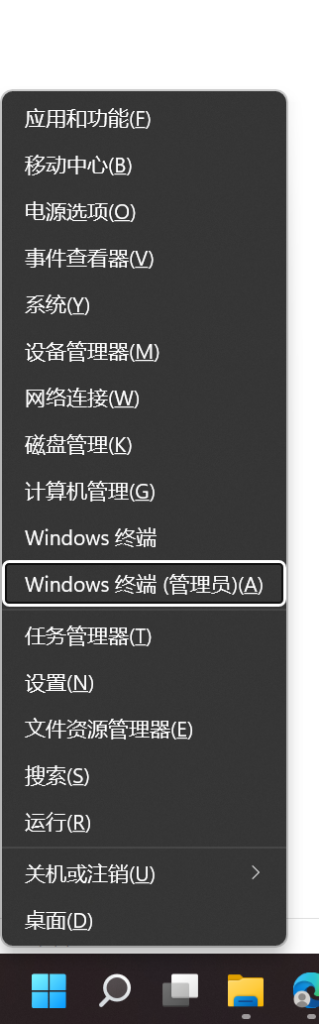
同时按下Windows 徽标键 + X打开Windows终端(管理员)
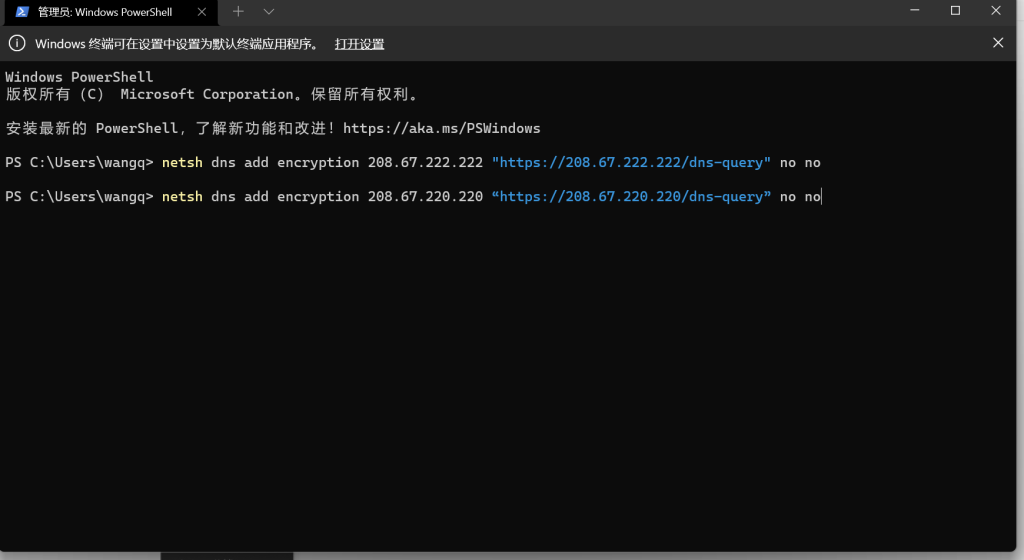
然后输入(这里以Open DNS为例)
netsh dns add encryption 208.67.222.222 "https://208.67.222.222/dns-query" no no netsh dns add encryption 208.67.220.220 “https://208.67.220.220/dns-query” no no
输入完成后按Enter键
8.将DNS加密设为仅加密
由于国内互联网环境比较特殊,建议先测试所选DNS在大陆加密后能否正常试用,比如说四川电信就无法使用加密了的cloudflare1.1.1.1和Google8.8.8.8,我的解决方法是使用open DNS(服务器地址在下文“其他”中)
其他:
DNS的Wiki:
https://en.wikipedia.org/wiki/Domain_Name_System
DoT的Wiki:
https://en.wikipedia.org/wiki/DNS_over_HTTPS
我推荐的公共dns:
1.cloudflare的1.1.1.1
For IPv4: 1.1.1.1 and 1.0.0.1
For IPv6: 2606:4700:4700::1111 and 2606:4700:4700::1001
官网:https://1.1.1.1/dns/
2.Google DNS:
The Google Public DNS IP addresses (IPv4) are as follows:
8.8.8.8
8.8.4.4
The Google Public DNS IPv6 addresses are as follows:
2001:4860:4860::8888
2001:4860:4860::8844
官网:https://developers.google.com/speed/public-dns/
3.Open DNS:
For IPv4:208.67.222.222 and 208.67.220.220
For IPv6:2620:119:35::35 and 2620:119:53::53
https://www.opendns.com/
4.腾讯 119.29.29.29 182.254.118.118
https://www.dnspod.cn/Products/Public.DNS
5.阿里 (不确定能否加密) 223.5.5.5 223.6.6.6
http://alidns.com/
6.百度 (不确定能否加密) 180.76.76.76
http://dudns.baidu.com/intro/publicdns/
7.CNNIC (不确定能否加密) 1.2.4.8 210.2.4.8
http://www.sdns.cn/
